Step by step guide for Retail Store Scale Unit
(RSSU) Configuration and Installation in Microsoft Dynamics 365 – Finance and
Operations
- To set up Retail Store Scale Unit (RSSU), first create an Azure Active Directory application. To create the same, login to your Azure account through the Azure portal https://portal.azure.com and check you have required permission to create the same. Follow the below steps to check and create application.
- To
check that you have required permission, login in to azure portal, click Azure
Active Directory in the left pane

- And then click user settings and check that in the right side, “User can register applications” is set to “YES”

- And If the app registrations setting is set to NO, only global administrators can register apps. You can check your roles and permission by clicking overview in the above page.

- Now to create the Azure Active Directory application click Azure Active Directory in the left

- Then click App registrations in the left and then click New application registration in the top

- Then enter the detail as in below example

- Now click the application which is created and copy the Application ID and store it.

- To generate an authentication key, select Settings.

- To generate an authentication key, select Keys.

- Provide a description of the key, and a duration for the key. When done, select Save.

- After saving the key, the value of the key is displayed. Copy this value because you are not able to retrieve the key later. You provide the key value with the application ID to log in as the application. Store the key value where your application can retrieve it.

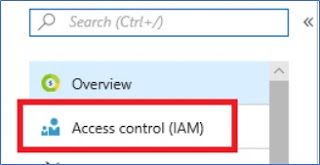
- Now assign application role to the app. Click subscription and then click Access control (IAM).
-

- Then select role as below and select the application which is created and save.

- After an application ID (client ID) and secret are created for Retail Store Scale Unit, the client ID must be accepted in Retail. Connect to D365 environment and go to System administration > Setup > Azure Active Directory applications. Enter the application ID (client ID) in the Client ID column, enter descriptive text in the Name column, and enter RetailServiceAccount in the User ID column.

- Now to create a functioning Retail Store Scale Unit, go to Retail > Headquarters setup > Retail scheduler > Channel database.
- On the Channel database page, on the Action Pane, select New.
- In the Channel database ID field, enter a unique value.
- In the Channel data group field, select the Default option.
- You can leave the Data sync interval field blank. Alternatively, you can select a value in this field. For example, in the demo data, the value D60-U15 specifies a 15-minute synchronization interval.
- On the Retail channel Fast Tab, select Add, and then, in the Channel field, select the appropriate Retail store channel which you might have already created. Repeat this step to add all the channels that should use this database.
- On the Store Scale Unit Package Fast Tab, in the Name field, select the appropriate Retail Store Scale Unit package. Each environment generates a base Retail Store Scale Unit package. Therefore, this field always contains at least one option.
- On the Action Pane, select Save. Details like in below screenshot.

- Go to Retail > Channel setup > Channel profiles.
- On the Action Pane, select New.
- In the Name field, enter a unique name for the channel profile.
- On the Action Pane, select Save.
- On the Profile properties Fast Tab for the new channel profile, select Add.
- In the Property key field, select Retail server URL.
- In the Property value field, enter the URL of the Retail Server that should be installed for Retail Store Scale Unit.
- The standard format for the URL of an on-premises store installation of Retail Store Scale Unit is https://<Computer Name>:<Port>/RetailServer/Commerce. In this format, <Computer Name> is either the fully qualified domain name (FQDN) of the computer where Retail Store Scale Unit is installed or, for systems that aren't joined to a domain, the full computer name. <Port> is the port number that should be used in the installation. The port number must be a value between 1 and 65535. If you're using the default HTTPS port (443), you don't have to specify the port number.
- On the Profile properties Fast Tab for the new channel profile, select Add.
- In the Property key field, select Cloud POS URL.
- In the Property value field, enter the URL of the Retail Cloud POS instance that should be installed for Retail Store Scale Unit.
- The standard format for the URL of an on-premises store installation of Retail Store Scale Unit is https://<Computer Name>:<Port>/POS. In this format, <Computer Name> is either the FQDN of the computer where Retail Store Scale Unit is installed or, for systems that aren't joined to a domain, the full computer name. <Port> is the port number that should be used in the installation. The port number must be a value between 1 and 65535. If you're using the default HTTPS port (443), you don't have to specify the port number.
- On the Action Pane, select Save. Details as in below screenshot.

- Go to Retail > Channels > Retail stores > All retail stores.
- Select the Retail channel ID for the retail store that will use the new channel database.
- On the details page for the selected store, on the Action Pane, select Edit.
- On the General Fast Tab for the store, in the Live channel database field, select the channel database that you created in step 3.
- On the Action Pane, select Save.
- On the General Fast Tab for the store, in the Channel profile field, select the channel profile that you created in step 12.

- Go to Retail > Headquarters setup > Retail scheduler > Channel data group.
- Select the Default data group, and then, on the Action Pane, select Full data sync. In the Select a distribution schedule field, select job 9999, and then select OK. In the dialog box that appears, select OK to confirm the full synchronization. All the data in the channel database is prepared for download.

- Now go to channel database that is created, click download and then download the Retail Store Scale Unit Package and the Configuration file.


Run
the Retail Store Scale Unit installer
Before you run the Retail Store Scale Unit
installer, make sure that all system requirements are met. The Retail Store Scale Unit installer first
extracts the associated files. It then begins the installation.
- On the first page of the installer, select the components to install. You can install the following components:
·
Retail channel database with Async Client
·
Retail Server
·
Retail Cloud POS
After you've selected all the components to
install, select Next to continue.

2. The installer
validates that all prerequisites are met. Setup will also download SQL Express
if it is not present.
3. Verify the URL for
Application Object Server (AOS), and then select Next. (The AOS URL
is the URL that is used to access Retail headquarters.)

4. Select a valid
Secure Sockets Layer (SSL) certificate to use for HTTPS communication.
The certificate must use private key storage, and
server authentication must be listed in the enhanced key usage property.
Additionally, the certificate must be trusted locally, and it can't be expired.
It must be stored in the personal certificate store location on the local
computer. Self-signed certificate is recommended in the test environment.

5. If a specific user
is required, enter the user name and password that the application pool should
run under. By default, the installer automatically generates a service account
to use. This approach is more secure and is recommended.

6. On the next page,
enter the user account and password for the Retail Server application pool and
Async Client. By default, this account is automatically generated. However, you
can manually enter the user account and password.

7. Enter the HTTPS port
to use and verify that the host name of the computer is correct. Then
select Next to continue.

8. Enter the
application ID (client ID) and secret that are associated with this Retail Store
Scale Unit installation. Additionally, verify the channel database ID, which is
automatically entered from the configuration file. Then select Install.
If you will use Retail Cloud POS, make sure that the Configure Retail
Cloud POS check box at the bottom of the page is selected. This
configuration requests Azure AD sign-in and automatically generates all
required information in Azure, so that Retail Cloud POS can be used
on-premises.
For information about how to create web
applications in Azure, see Create an
Azure Active Directory application.
When you create the Web App, the initial URI and
URL don't have to be any specific value. Only the application ID (client ID)
and key (secret) that are created are important.

After you sign in to your azure account, it will
start Retail Store Scale Unit, Channel Database, Async Client, Retail Cloud POS
and Retail Server.

9. After the
application ID (client ID) and secret are created for Retail Store Scale Unit,
the application ID (client ID) must be accepted in Retail. Follow the next
procedure to finish the configuration in Retail headquarters.
10.
After the
installation is completed, the final health page appears. This page shows
whether the installation was successful. It also shows the health of each
component, based on basic connection tests, and the location of this topic. If
the installation wasn't successful, the page shows the location of the log
files. We recommend that you keep this final health page open until you've
completed the configuration of Retail Store Scale Unit and all components are
working correctly.

If you click the health check page link against the
RetailServer, it should the following status in the browser.

Finish the Retail Store
Scale Unit configuration in headquarters
The last steps require validation and verification
that the Azure application ID (client ID) and key (secret) are correctly
accepted in Retail headquarters, so that connections can be made between the
environment and the new Retail Store Scale Unit.
1. After the
application ID (client ID) and key (secret) are created for Retail Store Scale
Unit and entered in the installer, the application ID (client ID) must be
accepted in Retail headquarters. In Retail headquarters, go to System
administration > Setup > Azure Active
Directory applications. Enter the application ID (client ID) in the Client
ID column, enter descriptive text in the Name column,
and enter RetailServiceAccount in the User ID column.
Note: This application id
different from what we have entered during the start of setup. This application
id is displayed in the final health page.

2.
If Retail Cloud POS
is configured for use, a client ID is shown at the end of the installation. You
must add this client ID to the Retail shared parameters page
in Retail.
a. In Retail, go to Retail > Headquarters
setup > Parameters > Retail shared
parameters.
b. Select Identity
providers.

c. On
the Identity providers Fast Tab, select the provider that
begins with HTTPS://sts.windows.net/. The values on the Relying
parties Fast Tab are set, based on your selection.
d. On
the Relying parties Fast Tab, select +Add. Enter
the client ID that is listed on the final health page of the Retail Store Scale
Unit installer. Set the Type field to Public and
the UserType field to Worker. Then, on the Action
Pane, select Save.

e. Select
the new relying party, and then, on the Server resource IDs Fast
Tab, select +Add. In the Server Resource ID column,
enter https://retailstorescaleunit.retailserver.com.
f.
On the Action Pane, select Save.

3.
In Retail, go
to Retail > Headquarters setup > Parameters > Retail
shared parameters.
4.
Select Identity
providers.
5.
On the Identity
providers Fast Tab, select +Add.
6.
In the new Issuer row,
enter the Retail Server URL of the newly installed Retail Store Scale Unit. At
the end of the URL, add /auth. The URL will
resemble https://MyComputerName/RetailServer/auth.
Note
There will be a new identity provider line for each
Retail Store Scale Unit that is installed. Each Retail Store Scale Unit will
have a URL that resembles this URL.
7.
In the Name column,
enter a description for the store that the URL belongs to.
8.
In the Type column,
select Open ID Connect.
Note
This new row must be duplicated for every Retail
Store Scale Unit installation (that is, for every unique URL).
9.
On the Action Pane,
select Save.

10.
On the Identity
providers Fast Tab, select the newly created line. The values on
the Relying parties Fast Tab are set, based on your selection.
11.
On the Relying
parties Fast Tab, select +Add, and add the following two
entries:
·
In the ClientID column,
enter Cloud POS. Set the Type field to Public and
the UserTypefield to Worker.
·
In the ClientID column,
enter Modern POS. Set the Type field to Public and
the UserTypefield to Worker.
12.
On the Action Pane,
select Save.

13.
When you've
finished, return to the Retail Store Scale Unit installer, and select Close.
The final page of the installer includes valuable
information that you can use to test and validate that all components work
correctly. Keep this page open until you've completed the validation.
Note
If the installer doesn't show a check mark for
Retail Server, Async Client, or any other component, wait 10 minutes, so that
any cached values can be updated in the cloud. Then check again. If the
installer still isn't fully successful, run a full synchronization on the new
channel database that this installation uses
Activating the newly
created Cloud POS
1. Now
click the link of the Cloud POS and once the page is opened, Click Next to
Activate the Cloud POS.


2. Now
check the Retail Server URL and click next.


3. Login
to your Microsoft account which is imported in the User of the D365 environment
and an employee is mapped to the user through external identity. Sometimes you
might get the following error. “AADSTS50011: The reply url specified in the
request does not match the reply urls configured for the application: ‘xxxxxxxx’.
More details: Reply address did not match because requested address did not
have a trailing slash.”


So, to correct the same, Go to Azure Active Directory > App Registration.
Then select Retail Store Scale Unit Cloud POS app. Then click settings
and then Reply URLs
and then add “/” at the end of the address.


4. After
login and if the URL is successfully validated, select the store that you want
to activate.


5. Then
select the register and click Activate
button.


6. If
the device is activated successfully, you will get the following message. After
that you can login to your cloud POS.


7. After
login to Cloud POS, you sometimes get the following error. “The authorization
token issuer is invalid. An identity provider with a matching issuer was not
found in the system.”


So, to correct the same, go to
the PC where the Retail Store Scale Unit have been setup. Click Start and then Run and
type inetmgr in
the box and press ok.


Expand to
RetailServer site and then right click the Retailserver and click explore

Open the
web.config file in the notepad


And then find, “<add key="CommerceTokenIssuer" value=”
and then verify the value entered is same and exact to the value entered in Retail Shared
Parameters in the identity provider. It is case sensitive.


Then click RUN
and type iisreset
and press ok.
Activating the Modern
POS
Before activation Modern POS, download
the Retail Modern POS
setup and configuration file. Also download the SSL certificate from RSSU
server and trust the same in PC where you are installing modern POS.
1. Go
to Retail > Channel Setup > POS Setup > Devices and
select the device which you want to activate for Retail Modern POS. Then click DOWNLOAD
button and download Retail Modern POS and Configuration file.


2. Copy the installer
and configuration file where you want to configure Retail Modern POS, click the installer file, then click next

3. Once the installer verifies
the prerequisites, the installer will install the required files and completes
successfully.


4. After the
installation is complete, click the Retail
Modern POS app

Note: If you are
activating the Modern POS with built-in Administrator account, then you might
get the following error. “Retail Modern POS can't be opened with Built-in Administrator
account. Sign in with different account.
To correct the same, Click start and RUN, then type
“secpol.msc” and press ok.

In the Local Security Policies go to User Account
Control: Admin Approval Mode for the Built-in-Administrator account in the Local Policies > Security Options. Set
the Security Setting to Enabled.

Then in the Start > Run type “regedit” and click
Ok. Navigate to HKLM>Software>Microsoft>Windows>CurrentVersion>Policies>System>UIPI
then modify the value data to “0x00000001(1)” then close the register
editor.

Then go to Control Panel > User Accounts > Change
User Account Control Settings. Then change the slider to 3rd
level as below and press Ok and restart the computer.

5.
Now click the Retail Modern POS app again, it should open now, and start the
process of activation.

6.
Then click next and select the Device ID and
Register which you want to activate and click activate.

7.
Sometimes during Modern POS activation, you
might get the following error: “DA3001 – A connectivity error has occurred and
your device can’t connect to the server.”

To resolve the above, make sure that you have imported
the SSL certificate from Retail Store Scale Unit server and imported in the
trusted people and personal folder. Also if the RetailServer and the Modern POS PC's are not in a domain environment, then you might have to put the RetailServer URL in the hosts file in the following location "C:\Windows\System32\drivers\etc".
Also try to avoid activation of Retail Modern POS in the RSSU server.
It might require Microsoft Loopback Adapter.
8. After the Retail Modern POS activated
successfully, it will show the following message and you can login to Modern
POS.

This comment has been removed by the author.
ReplyDeleteThanks :)
ReplyDeleteWhat are the advantages of using Retail store scale unit in d365
ReplyDeleteGetting error while install Mpos:
ReplyDeleteStep 3 of 11: Creating device token failed.
DA1018 - The authorization token issuer is invalid. An identity provider with a matching issuer was not found in the system.
Application session ID
d2ef3287-d1c1-f62d-21b6-cdbdcf6cc950
Outstanding post. Thanks for this great content.
ReplyDeleteMicrosoft Online Training
I found Hubwit as a transparent s ite, a social hub which is a conglomerate of Buyers and Sellers who are ready to offer online digital consultancy at decent cost. cheaploansdirectory.com
ReplyDeleteHere is the investors contact Email details,_ lfdsloans@lemeridianfds.com Or Whatsapp +1 989-394-3740 that helped me with loan of 90,000.00 Euros to startup my business and I'm very grateful,It was really hard on me here trying to make a way as a single mother things hasn't be easy with me but with the help of Le_Meridian put smile on my face as i watch my business growing stronger and expanding as well.I know you may surprise why me putting things like this here but i really have to express my gratitude so anyone seeking for financial help or going through hardship with there business or want to startup business project can see to this and have hope of getting out of the hardship..Thank You.
ReplyDeleteThanks for this great content.
ReplyDeleteReally informative post ....Thanks a lot.
ReplyDeletePlease share the post for Retail Functional configurations like store and all
This concept is a good way to enhance the knowledge.thanks for sharing.. Great article ...Thanks for your great information, the contents are quiet interesting.
ReplyDeleteMS Dynamics Trade and Logistics Online Training
Microsoft Dynamics Operations Trade and logistics Training
Microsoft Dynamics operations Trade and Logistics
MS Dynamics Trade and Logistics Training
MS Dynamics Operation Trade and Logistics Training
The information which you have provided in this blog is really useful to everyone. Thanks for sharing.
ReplyDeleteD365 Finance Training
wonderful article. Very interesting to read this article.I would like to thank you for the efforts you had made for writing this awesome article.Thanks for giving a great information about nice Article..
ReplyDeleteoracle training in chennai
oracle training institute in chennai
oracle training in bangalore
oracle training in hyderabad
oracle training
oracle online training
hadoop training in chennai
hadoop training in bangalore
Your blog is too much amazing. I have found with ease what I was looking. Moreover, the content quality is awesome. Thanks for the nudge! best-laptop-for-medical-billing-and-coding
ReplyDeleteI was surfing net and fortunately came across this site and found very interesting stuff here. Its really fun to read. I enjoyed a lot. Thanks for sharing this wonderful information. gépszállítás Europa-Road Kft
ReplyDeleteThanks Terri :)
DeleteThanks for the blog article.Thanks Again. Keep writing.
ReplyDeletesalesforce online training in hyderabad
salesforce online training hyderabad
hi, step 46 I am getting this error.
ReplyDeleteProperty LCS.LCSEnvironmentId is empty string from object instance ApplicationEnvironment.
just updated in Operational Insights
Deletehi i`m facing same error i`m trying to apply the steps on local development environment. could you please help me?!
Delete